|
"Avance à la victoire, mes amis! Nous avons les Anglais et leurs laquais sur la course!"
|
 |
| "Here at Honest Johnny's, doubling victories is only the start of what we can do for YOU!"* |
I won my second battle for the year! A doubling of victories on my honour roll! From such a low base, my 50% increase in victories isn't really that spectacular, but I'll take it, anyway :-)
Tim and Pete E. offered battle to Malcolm and myself. They had 1000 points each of Anglo-Portuguese, while I had 1000 points of French and Malcolm used 1000 points of my Franco-Italians, including a rare outing by the Italian Guards. While Malcolm faced off against Pete's British, I took on Tim's Anglo-Portuguese force.
 |
| My left hand brigade marches out behind the light cavalry screen |
 |
| In the center, my other two brigades move forward |
 |
| The Italian chasseurs again strut their stuff |
 |
| On my right, Malcolm moves on Pete |
 |
| As Tim was playing Anglo-Portuguese, I shouldn't have expected him to move off the ridge. I eventually got the message and detached the voltiguers to disorder the Portuguese before my brigades traversed the woods. |
 |
| On the right, my light cavalry division threaten Tim's right. |
 |
| Behind the cavalry, my left hand brigade follow the cavalry to take advantage of any opportunities that presented |
 |
| Tim's British cavalry appear over the ridge facing my main body to counter my deployed skirmishers |
 |
| The skirmishers fall back into the woods, away from the cavalry threat, before they can make their presence felt, |
 |
| In order to counter Tim's cavalry threat, as well as to put the wind up his infantry, The Italian chasseurs transferred to the centre. |
 |
| Tim charged at one of the columns I had in the central woods. Instead of meeting him in the woods, I charged out, copping the disorders as well as a round of canister from Tim's guns. The results weren't so good for me! |
 |
| Tim gallantly wound the clock back and offered for me to see what would happen if I didn't counter-charge. Instead, I waited in the woods, while he charged in. He got the disorders, and his gun couldn't fire in support. |
 |
The result was that the British lost the combat and were forced to retire with disorders and casualties. I also copped casualties and disorders, but held my ground.
Very sporting of you Tim! |
 |
| My chasseurs make their presence felt as Tim's closest battalions form square. As his cavalry was still a threat to my infantry, I kept my right hand brigade safely in the woods. |
 |
| I was waiting for the opportunity to charge the squares with my infantry, but the single British regiment lurked on the flank of my approach, and the regiments in the woods were too heavily disordered. |
 |
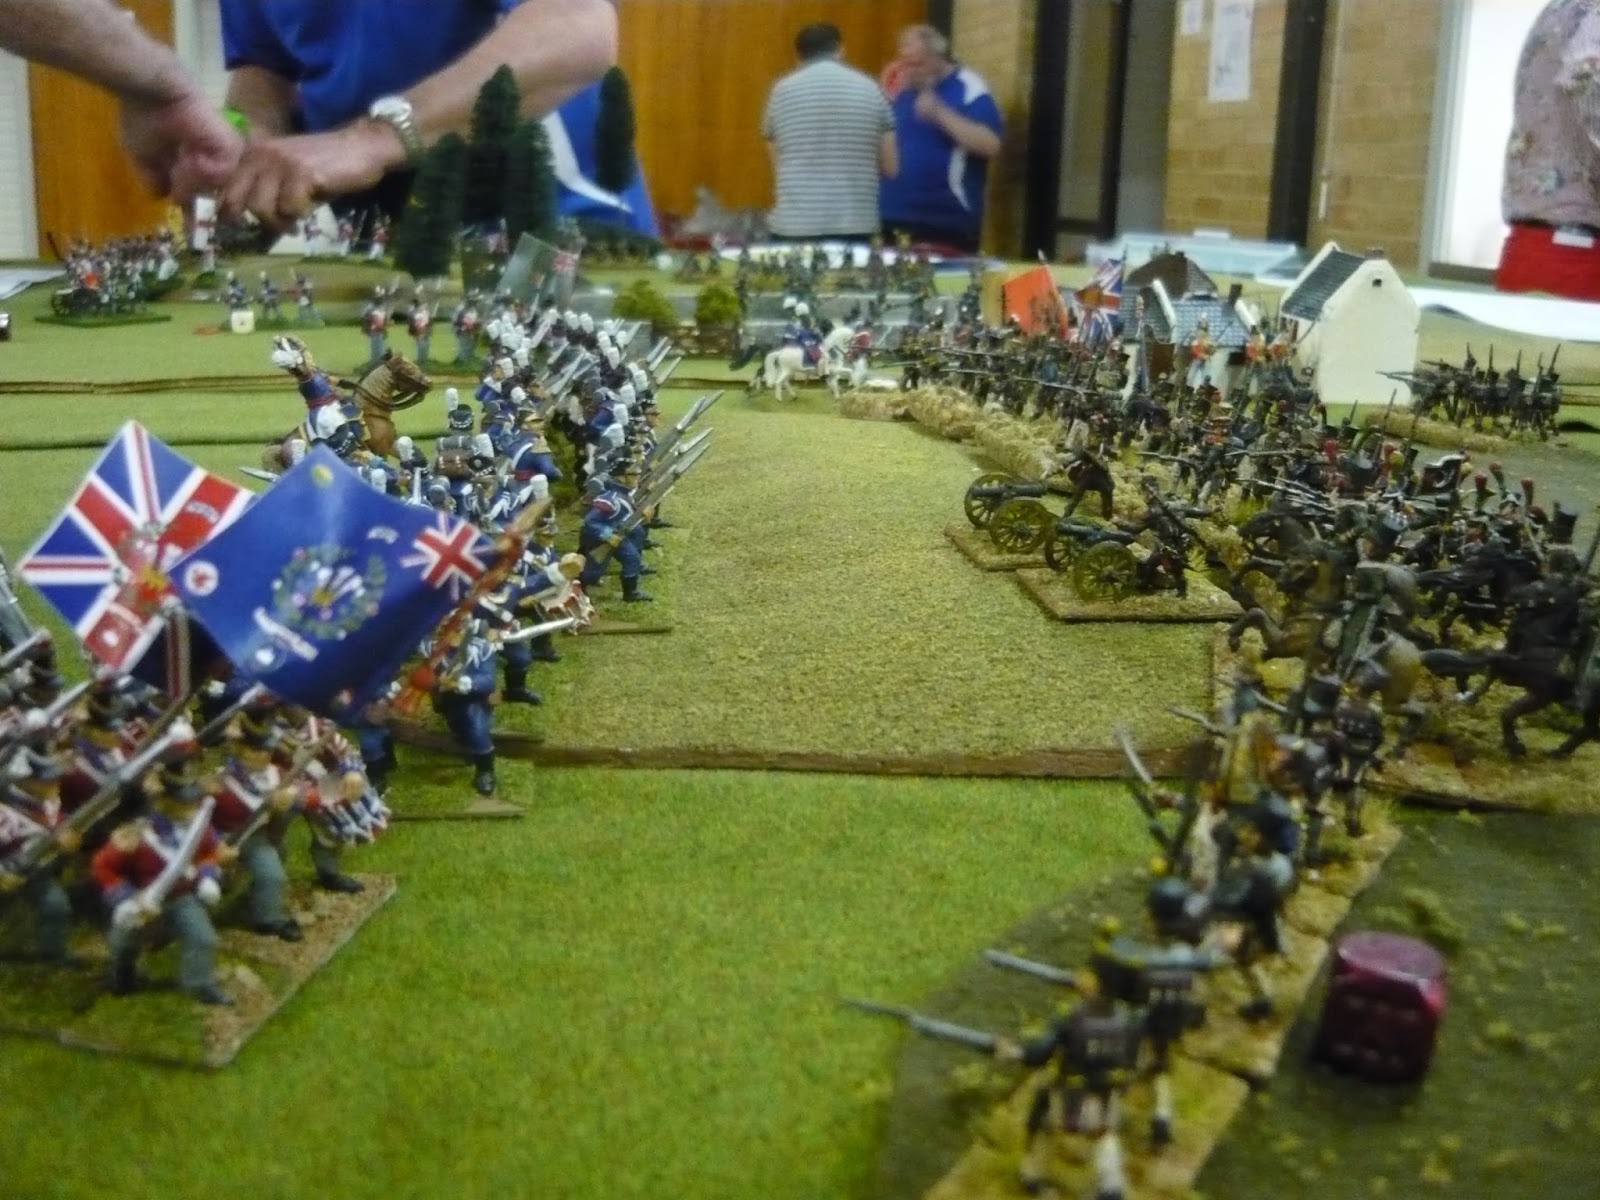
The bird's eye view of the situation so far.
Note Pete's British regiments massing on Tim's flank on my far right. |
 |
| Pete charged his regimental columns at the BUAs occupied by a couple of Malcolm's battalions. I tried to queer his pitch by counter-charging with my right hand battalion. They acted as a speed hump for the British... |
 |
| ...who crashed into the nearest BUA and expelled Malcolm's battalion with extreme prejudice! |
 |
| After Pete's steamroller impression, I decided it was a good idea to mask the town with a battalion, so he didn't get any ideas about flanking me, or popping up in my rear. |
 |
| Tim moved his cavalry to face off to the left, freeing up my infantry, which continued its march up the hill. He also pulled back his infantry to the bottom of the hill. As Tim's infantry were masked by the reverse slope, I wanted to get within sight of them before launching the charge, and hopefully knock off a couple of figures from the squares with my regimental guns beforehand. |
 |
| In the woods, I swapped battalions, so that the fresher one confronted the threatening British column, and deployed into line to maximise my firepower. |
 |
| My attack develops |
 |
| Allons-y! |
 |
| Over on my left, my brigade conformed with the general advance. You'll see the British cavalry in the background, though... |
 |
After cleaning up my gun battery, Tim's light dragoons charged into my French chasseurs, who promptly flubbed their pre-melee morale check, fell back in disorder and then met the charge at the standstill with disorders! I
Not an ideal outcome, I think you'll agree.
Still, in the resulting melee, they were only pushed back, not completely smashed. |
 |
As the distance my cavalry had to fall back would have caused them to fall off the edge of the world while they were in relatively good order, they just sat on the edge of the board, while any subsequent movement was measured from 12" off the board.
In this next turn, I was able to see off the cavalry with a flank shot from the left hand battalion. Tim was feeling more confident on this flanks as you can see by the fact he'd moved his infantry right to the forward slope |
 |
| On the far right flank, the rallied light infantry battalion joins in screening Pete's troops in the BUA |
 |
The time has come; CHAAAARGE!
Tim counter-charged to try and save the infantry square... |
 |
...but to no avail!
The Portuguese brigade retreats, following the breaking square, which Tim's desperate gamble failed to protect. |
 |
| After being in the rare position of winning a brigade charge, I had to be prompted by Tim to ask him for a divisional morale check! In the end he survived it, but with my successful charge ending up deep in his flank and Malcolm having the better of Pete, it was declared a Franco-Italian victory! Huzzah! |
As if the gods had seen fit to punish me for my victory, as I was packing up the car after wishing everyone farewell, I stuck the car key into the boot and twisted it to be greeted by the sickening sight of a key stump. I'd broken the key off in the lock! Too embarrassed to ask for a lift, I decided to make my own way home.
Now I don't know how many of you know the geography of Melbourne, but the club is in
Mitcham, in the east, and I live in the northern suburbs. At 11:30 in the evening, I had to take a train into the city and then another out. By the time I staggered home, it was well after 1 am!
The next morning I had to hoof it back out again with the spare key, hoping that the car with all my troops in it was still in one piece. I can tell you I was very relieved that it was!
*Disclaimer: Any actual doubling of victories is purely coincidental and Honest Johnny will not accept responsibility if the wargamer does not actually experience said doubling of victories.