Quote of the night: - Garry to Tim as 3 battalions of French turn tail and flee, "These figures you sold me don't work!"
After arriving at the club late (rotten weather, one car family, Mrs. Rosbif coming home after a late shift, picking up junior Rosbif #2 and collecting takeaway for dinner. Yeah, yeah, I know; excuses, excuses!), I found that Tim had set up his terrain and the boys had just completed laying out their troops. There is a benefit to turning up late after all! ;-)
Our opponents were different from the last time we'd attempted to play. This time Tim and I were opposed by John W. and Garry. John had gone for quantity over quality while Garry went for mainly veterans and elites. Luckily John W. with his hordes of conscripts and regulars was opposing Tim, while Garry faced me. I also preferred facing Garry as I think we are of a fairly similar level of generalship, while Tim and John W. are old hands who know the rules backwards and have quite a few tricks up their sleeves.
Tim had set up the terrain with a town in the centre flanked by woodlands. I was a bit too gung-ho and pushed my troops through the woods and set up a gun line from the woods to a small village on the right flank protected by the cavalry. I'd sent my riflemen supported by the British light companies to take on Garry's skirmished light battalion, but I should have skirmished my whole light battalion in turn, as his troops were elite. Even though mine were a class higher, his weight of numbers told and beat my skirmish line in skirmish combat. If I'd taken a leaf out of Tim's playbook, I would have stayed behind the woods and made Garry come for me, but as it was I'd gone through the woods copping the disorders, while the Spanish troops on the left were half-in, half-out of the woods. This was too much of a temptation for Garry, who charged the disordered Spaniards. I did a very un-Spanish thing and counter-charged with the first group and ended up retreating. The next couple of battalions then copped the morale minuses of having friends retreating and broke after being charged. This left a hole in my left which was filled by the French who having gone battle-mad, had to take the break-through and follow the fleeing Spanish. This in turn left them deep in the woods with the resulting disorders with Tim's British battalions on their left and mine on their right. The next turn saw both British brigades turn on Garry's flanks and rout him, hence the quote at the start of this post.
Meanwhile, on the other side of the table, Tim and John were engaged in some fairly heavy skirmish combat through the woods while John's left hand units occupied the closest buildings to secure his flank against Tim's Spanish in the village. Tim's guerrillas attempted to slow the French advance in front of the village, but really didn't even act as a speed bump, eventually being chased of by Garry's skirmishers. The battle in the woods ebbed and flowed with Tim attempting to draw John on and get him to rack up disorders through the woods, but eventually John made it through where a ding-dong battle of fairly evenly matched poor quality troops slugged it out with one trying to outflank the other. At one stage towards the end of the night Tim had got in John's flank and fired, expecting the battalion to crumble and flee, opening the rest of the French line to be rolled up like a Persian carpet. John had other ideas, however, and pulled out a series of morale saves that prove he's sold his soul to the Devil in return for lucky dice rolls when he needs them most! Of course, his troops stood when they should have fled for the hills and in turn managed to savage Tim's astounded troops who were left with their pants down expecting to be facing nothing but the sight of French heels.
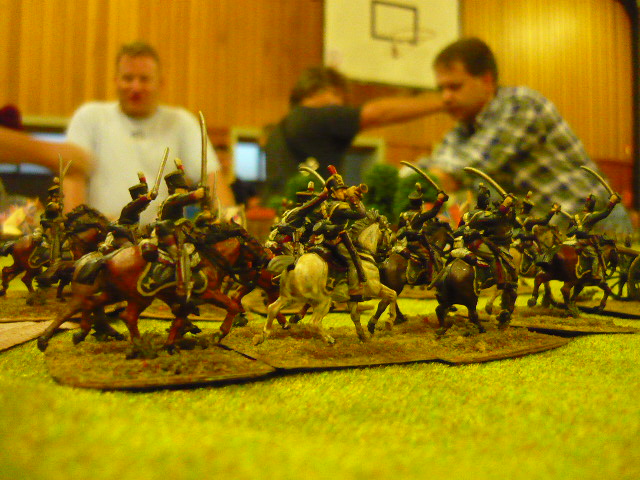
Meanwhile, after Garry's successful attack, I thought the time was right for a little cavalry action and charged one of my light dragoons squadrons against Garry's dragoons. I thought if I was successful in driving off his cavalry, his remaining infantry would be pinned in place in square and would be vulnerable to a combined arms attack with infantry and artillery to follow up, leaving his 3 successful infantry battalions stranded in the woods to be mopped up later. However, plans don't always work out as I rolled a 1 while Garry rolled a 6 in our melee. The complete opposite form last week! My light dragoons retreated while my Spanish gunners did another un-Spanish thing and fled their guns voluntarily while the nearest British infantry battalion squared up to meet the battle-mad dragoons who plunged forward despite the wishes of their commander. The square stopped them in their tracks and forced them back, leaving their vulnerable flanks open to attack in the next round, which I duly did. The Walloon Guards formed line and fired, destroying them and making the remainder a fleeing rabble, never to be seen again, while the 71st Glasgow Highland Light Infantry on the left formed line and fired into the flank of the nearest French column stranded after its victorious charge the previous turn. Fleeing Frenchmen resulted as previously described. A divisional morale test was asked for and made, but Garry survived to continue the fight.
Garry decided to form a protective line to meet the oncoming attack that he knew was coming and got his skirmishers out front to add to the disorders most of my units were still carrying from their passage through the woods. This time I skirmished the light infantry to meet the threat and to shelter behind in order to regroup and knock off the disorders before going on the offensive. Out on the right flank, my second squadron of light dragoons were occupied with keeping the Vistula lancers at bay and twice ended charges exactly where they started, even with the support of my horse battery, which did more damage than the actual charges.
The night ended on my flank with the 92nd Highlanders and the Walloon Guards advancing in line followed by the re-manned Spanish 9-lb battery and the recovered light dragoons who'd been defeated by the French dragoons. If there'd been time, I was planning an all arms attack on Garry's line that would have cracked him wide open, or at least put a lot of pressure on it that would have been hard to counter.
Tim was under severe pressure on his side of the table, but John admitted that he was finding it hard to crack Tim's defensive line, even though the ascendancy was with him. So, on my side of the board I was on the offensive, but would have been unable to exploit any success as Tim may have had to break off, leaving my left exposed.
It was a corker of a game, enjoyed by all, that swept back and forth without anyone being in the box seat until the end. If only I'd turned up earlier I may have been able to exploit my advantages near the end. Oh well; C'est le guerre!
 |
| My Spaniards start the game crossing hedgerows and fences |
 |
| Tim's forces covered to the front by British riflemen and to the right by line battalions |
 |
| John W.'s Frenchies |
 |
| Tim has Hatters too, in fetching sky-blue |
 |
| My Spaniards advance to their doom! |
 |
| Light dragoons in column on my right flank |
 |
| My skirmish line enters the forest |
 |
| John W.'s enters the woods on the other flank |
 |
| Some lovely block painting examples in John's collection |
 |
| En masse |
 |
| En avant! |
 |
| Tim's Spanish cavalry; will they have better luck this time? |
 |
| My Spaniards half in, half out of the woods. Not the wisest positioning of my forces - again! |
 |
| My right flank |
 |
| Tim's 5/60th clash with John's Legere |
 |
| Tim's cavalry bravely holds the gap between village and woods |
 |
| Guerillas play at soldiers in front of the village |
 |
| My better troops on the right can't protect the Spaniards from their fate! |
 |
| Tim's troops in the town about to get a dose of 6lb-er medicine |
 |
| Tim's Spanish light troops engage John's line in the woods |
 |
| My skirmish line struggles to hold against Garry's weight of numbers |
 |
| Garry's columns. An example of the new Hinchcliffe line which, incidently,(Gratuitous PlugWarning!) Garry happens to be Australian distributor for. (0431 454 966 or wargamesminiatures@y7mail.com) |
|
 |
| Tim's British columns, or my avenging saviours! |
 |
| Tim holds the houses to the left and right, but John has seized the upper central building |
 |
| Garry's Hinchcliffe figures showing his lovely painting and basing skills. Am I overdoing it Garry? I'll accept a small promotional fee! :-) |
 |
| The steel backbone of my division; closest to furthest - 92nd Highlanders, Walloon Guards and 71st Glasgow Highland Light Infantry. |
 |
| For what we are about to receive may the Lord make us truly thankful, Amen! |
 |
| John's attack progresses through the woods and the gap by the village |
 |
| Tim's troops advance to meet the challenge |
 |
| No pasaran! |
 |
| The first French charge met by Spanish countercharge. Not a wise idea when I'm carrying 2 disorders! |
 |
| The result? Run away! |
 |
| The resulting gap! |
 |
| The 2nd charge and countercharge |
 |
| And the resulting French breakthrough |
 |
| The 3rd charge.You can guess the rest! |
 |
| My death or glory charge in the centre |
 |
| The moment I realised things were crook! |
 |
| The dragoons canter into British firepower! |
 |
| Then cop a devastating flank fire from the Walloon Guards |
 |
| The highland lights then pour flank fire into the nearest French column |
 |
| Tim's British join the fun and 3 battalions scarper |
 |
| Tim's gauchos keep an eye on Garry's skirmishers. They ended up being persuaded to leave the field after a round of solid shot reminded them they had a prior engagement elsewhere! |
 |
| Reg. Irlanda advances between the Highlanders and the Walloon Guards |
 |
| My horse guns spray the Vistula Lancers in the distance |
 |
| My second squadron of ligh dragoons facing off against the Vistula Lancers. |
 |
| John's Skirmish line breaks through the woodline |
 |
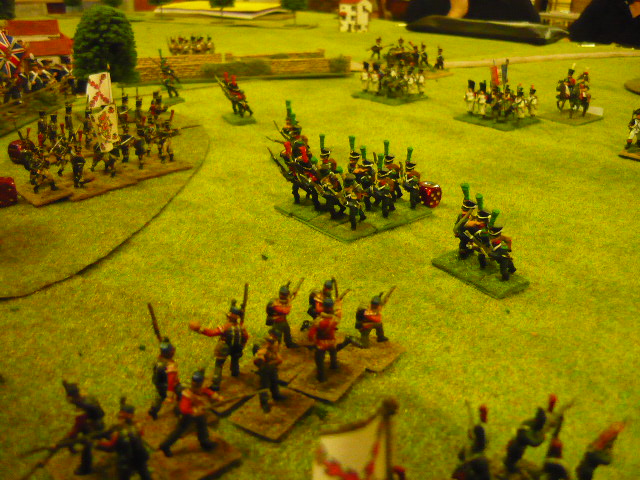
| The French columns advance past the village |
 |
| My dispositions after my successful counter attack |
 |
| Tim's situation around the same time; the French are through the woods but faced by a solid block of Spanish infantry |
 |
| The start of the attack on the French line. I 've skirmished the light infantry in preparation for taking on the French skirmishers and remanned the guns in the foreground |
 |
| Skirmishers ready to advance |
 |
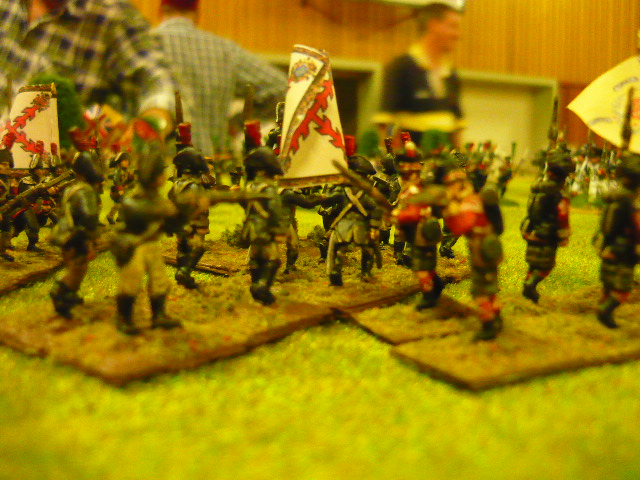
| Walloons, Irlanda and Gordons advance |
 |
| French square in a bit of bother threatened by British Hussars and Spanish infantry. |
 |
| French counter attack to rescue the square |
 |
| Successfully pushes back the Spanish infantry |
 |
| The French attack builds on the far flank, but is stubbornly resisted |
 |
| My developing combined arms attack, but too late to put into effect! |


A fine report Rosbif,
ReplyDeleteGreat to see so many quality troops on the table. Your newly finished Spanish hatters got their first taste of combat too.
The Hinchcliffe figures look really smart.
Cheers
Paul
Thanks Paul. We try our best ;-)
ReplyDeleteIf you examine the later pictures you'll notice that my Hatters actually rallied and were making their way to the front again!
Hi
ReplyDeleteInteresting and colorful AAR and figures.
I love your 'No pasaran!' Spanish Light Infantry unit and their tarleton helmets!
Best regards from the cold Spain!
Rafa
Thanks Rafa, although I can't claim credit for those figures; they're part of Tim's extensive collection of 28mm Front Rank figures. I'll pass your compliment on, though!
ReplyDeleteCheers from tropically hot and sticky Melbourne!
Rosbif,
ReplyDeleteHow do you protect your plastic figures from the rigours of wargaming as the paint just flakes off ours? We have hundreds and hundreds of them in my loft waiting to be ebayed but seeing them in your blog got me thinking we could use them.
Cheers
Paul
Paul, I had the same problem even after washing them in warm soapy water as recommended. After using a spray on black undercoat, then using brushed on Army Painter followed by a layer of spray-on matt varnish, I haven't looked back.
ReplyDeleteGreat looking figures and game.
ReplyDeleteJohn