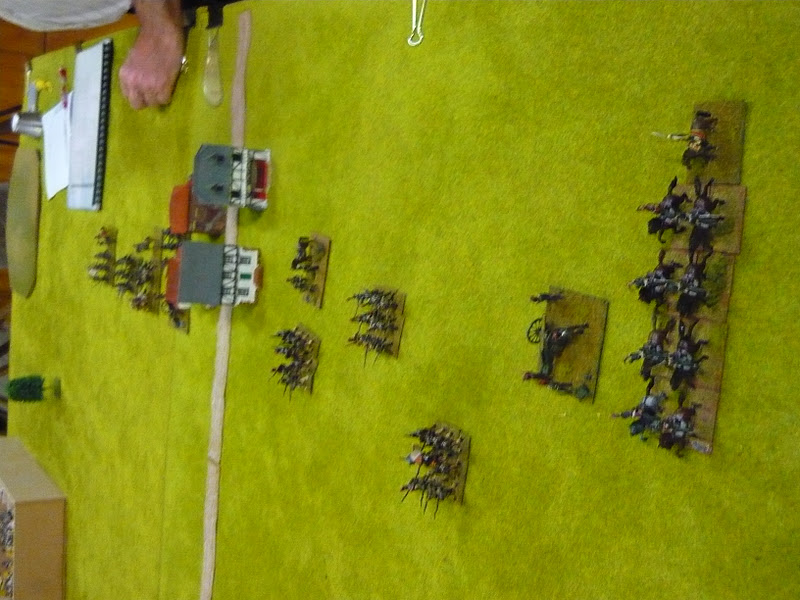
It seems a long time since I last played a game, so it was good to get back in the harness, so to speak, last Friday night.
In preparation for the upcoming Wagram re-fight, we played a 1:120 scale battle French vs. Austrians.; Tim and Andrew S. playing the horrible Hapsburgs, while Tony and I commanded the Emperor's finest.
I hadn't really got my head around what 1:120 meant, assuming that for the same number of points, I'd have half the number of troops I'd usually have on the table-top, so Tony and I started out drastically outnumbered! When it was pointed out that the scale means the same number of troops as usual, but each battalion counts as a regiment, then I realised my mistake and we could get on with the game in earnest after putting the missing troops on the table. Ooops! My bad!
For my first game in over a month I'm surprised at how well I played the game, indicated by the fact that my new Chasseur unit survived the night and didn't even lose a casualty! Huzzah!
It was a game where the capriciousness of the dice decided the outcome of the combats, rather than the skills of the players, as Tim and I maneuvered around each other to put in flank attacks and frontal charges that gave one the upper hand, only to be countered the next turn by the other. Potentially game-winning maneuvers from both players were dashed by unco-operative dice rolls, leading to much amusement and head-shaking!
Playing Austrian you get a lot more bang for your buck, but at lower quality, while playing French the quality is there, but not the numbers. This meant that both sides struggled to exploit their opportunities as Tim's large units didn't have the firepower or morale to ruthlessly crush my smaller numbers, while I found that attacking his large formations was like punching jelly; they were so big that they just absorbed the damage I threw at them.
Tim and Andrew's objective was to take the village on our side of the table, while Tony and I had to prevent them. The French decisively won the roll to see who'd start first when I rolled a 6 on the d6. Tim tried an underhanded trick (dishonourable cad!) by responding with a d10, but still couldn't better my 6!
I started off by putting my Chasseur brigade and accompanying horse batteries out on the left flank, while I dadvanced the infantry into the centre of the field of battle. The terrain was devoid of any obstacles, so it was the perfect battlefield for a game of maneuver. As Tim's white horde advanced, I moved both cavalry elements to threaten his flank, so he responded by pushing his right hand formation in closed column to face me. This is where I was tempted to rush in in a headlong charge, but decided the better of it as my left flank would be hopelessly exposed if (as most likely) the cavalry charge had failed.
Tim extended this flank protection by putting his Jaegers into line, protecting his small cavalry unit form further artillery damage after I knocked off one figure and caused a morale failure, resulting in the Chevaux-leger retiring. The horse guns were then limbered and moved around the back of the cavalry line to exploit the gap in the Austrian line and fired into the flank of the advancing mass not causing damage, but a morale test on the artillery on the flank, which it survived, unfortunately.However, Tim was surprised as he wasn't expecting that move, so that was something I suppose!
Then came a couple of turns of push and shove as Tim's massed regiments charged and I counter-charged. The quality disparity was what saved me there, as I'd put my best troops in the centre ready to meet his expected attacks. His first attack bounced off my elite legere infantry, but he stil held the initiave with his greater numbers. I tried to extend my coverage by forming one of my line units into line, covered by the legere on the right and another line column on the left. This column on the left I had planned to charge at his battery on the flank of his formation, but when the time came, the combination of losses incurred in the resulting gunfire and an appalling die roll for my pre-melee morale check caused the column to halt 2" from the battery in all sorts of disarray! If this attack had succeeded, I would have cleaned up his guns and carried on into the flank of his central mass, possibly winning the game. C'est la guerre!
Instead of having Tim right where I wanted him, he now had me right where he wanted me! He formed up his Jaegers in column and charged my helpless column in the flank, causing them to retreat, before carrying on into the flank of the unit in line, causing them to retreat as well. On the other flank, his Hungarians tried to smash though my weakest line regiment, but fortunately the dice rolled well for me, and resulted in the Hungarians routing. The price was high, though, with the Austrian guns firing in support and the attack iteslf leaving the victorious French sadly depleted.
Tim tried his luck in the centre again, but even with the morale disadvantage of retreating friendly units, my tough legere stood firm in the middle, giving the retreating units the breathing space they needed to recover.
I tried to force things over on the left flank by charging my Chasseur brigade into the infantry mass in front of me, but even with artillery support, only mangaed to get them to retire. If I'd had better quality cavalry maybe the damage woulf have been greater, but ifs and buts don't win battles! At least this took some of the pressure off that flank. Tim's response was to put his depleted Chevaux-legere on the Chasseurs' flank, which I then countered by moving my horse guns to threaten the Austrian cavalry, ending in a bit of a Mexican standoff.
We were both fairly exhausted in the centre, while I still held the upper hand on the left flank. It the game had gone any further, Tim said he'd pull his infantry back to re-order them, sacrificing the Jaegers to their fate and try again. Meanwhile, my units that had retreated would have been fit for action again and could have supported or relieved the legere in the centre.My cavalry and horse guns would have dealt with his meagre cavalry threat and may well have proved the difference. Anyway, it wasn't to be, so we called it a night with a stalemate (although as the French still held the village, I call it a French victory!)
 |
| Chasseurs on debut supported by horse guns. A winning combination! |
 |
| HaT French line regiment |
 |
| Zvezda Leger with HaT elite figures leading |
 |
| Same unit from the front |
 |
| The might of the Hapsburg Empire! |
 |
| The French ready for anything the Kaiserliks can throw at them! |
 |
| Tony's command: foot guns, dragoons and infantry |
 |
| Tim's white wall in the foreground, with Andrew's to the rear |
 |
| The (depleted!) original French dispositions before reinforcement |
 |
| The French move first |
 |
| My first attempt at a flanking maneuver. Guns sitll limbered. |
 |
| Austrian counter-move |
 |
| Chasseur's eye view of the advancing Austrians |
 |
| The horse guns change position, unlimber and fire down the Austrian flank |
 |
| The white wall advances |
 |
| Hungarians on the march |
 |
| Austrians with artillery support |
 |
| The first Austrian charge failed, with the victorious French legere claiming the central ground |
 |
| The left hand infantry column sizes up the guns and the juicy infantry flank... |
 |
| ...and charges in! |
 |
| They are now left high and dry, facing the guns' mouths and offering their flanks for an irresistible charge... |
 |
| ... which goes in... |
 |
| ...with the inevitible results! |
 |
| Lots of casualties and disorders and facing the wrong way! |
 |
| The line suffers the same fate. |
 |
| The right hand regiment sees off the Hungarian threat while the general looks on approvingly. |
 |
| Tony throws out skirmishers to slow Andrew's advance. |
 |
| My valiant legere regiments require a dressing of the lines before resisting the continued Austrian pressure in the centre. |
 |
| The Chasseurs move around and put in their charge which managed to catch the Austrians in the flank and send them packing... |
 |
| ...but the Austrian cavalry form up to threaten the victorious Chasseurs' flank. |
 |
| The French horse guns come to save the day. |
 |
| "You got to ask yourself one question. Do you feel lucky? Well, do ya , punk?!" What Dirty Harry would say if he was a was a gunner. |
|
 |
| The Austrians' last hurrah; one last charge, met one last time by my rock-like legere. |
 |
| The recovered line regiment forming up for a spot of revenge on the Jaegers' flank, while their other former victims pin them from the front. |
 |
| How the battlefield looked at the end. The village still in French hands! |
 |
| Tim's valiant, but battered, Austrian sledgehammer |
 |
| Stalemate on the Andrew and Tony's side of the table, too. |
 |
| Marsch! |
 |
| Achtung, kavellerie! |
 |
| They stood like rocks! |
 |
| These chaps recovered from their ignominious retreat at the right time. |
 |
| Heroic Chasseurs on debut |