 |
| The French have a lot of emotional baggage to carry after this game! |
Sorry for being AWOL for so long, folks! Real life and all that jazz, you know...
Well, we had our club's open day on the the last weekend of August, including your humble correspondent's own game, trialed in the last post. It was good to see new folks and spruik our version of Napoleonic wargaming. A couple of interested visitors also told me they were regular visitors to this blog, too, which was very pleasing!
This is the game played with the lessons learned from the earlier one (although I still think I could play it again with further lessons learned from this iteration! More on that later....). As spectacle was called for, everything started on the board at the same time. The major difference being this time the Portuguese started as an independent command.
For those interested in the Order of Battle:
French:
- 1 Light cavalry brigade
- 1 regt. Hussars
- 1 regt. Chasseurs
- 1x 6 gun bty. 6lb horse guns
- 2 Infantry divisions
- 1st Div
- 1st Brigade
- 4 btns line infantry
- 1btn light infantry
- 2nd Brigade
- 4 btns line infantry
- 1 btn light infantry
- 1x 8 gun bty. 8lb foot guns
- 2nd Div
- 3rd brigade
- 4 btns line infantry
- 1 btn light infantry
- 4th brigade
- 1x 6 gun bty. 6lb foot guns
Anglo- Iberian Allies:
British
- 1 Light cavalry brigade
- 2 regt. light dragoons
- 1x 6 gun 6lb bty. horse guns
- 1 Infantry division
- 1st Brigade
- 2 regt. light infantry
- 1 regt. highlanders
- 2 regt. line infantry
- 2nd brigade
- 4 regt. line infantry
- 1 regt. provisional infantry
- 1x 6 gun 6lb bty. foot guns
Portuguese
- 1 btn Cacadores
- 4 btns line infantry
Spanish
- 1 Heavy cavalry brigade
- 1 regt. dragoons
- 1 regt. line cavalry
- 1 Infantry division
- 1 regt. Guard infantry
- 1 regt. Light infatry
- 1 regt. Converged grenadiers
- 8 regts Line infantry
- 1x 8 gun 9lb foot battery
 |
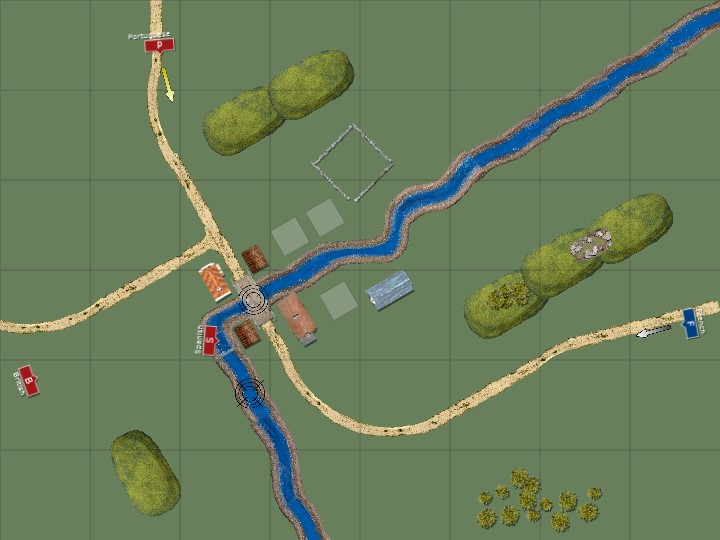
Map approximation of the tabletop. I don't think I have quite managed the placement of the fields correctly, but the gist of it is correct.
The French are advancing down the road from the right. The ford and bridge are marked by the gun-sights. |
Again, the objective for the French is to get the general's loot across the river at one of two crossing points, with the bridge held by the Spanish. The allies' objective is to thwart the French and, if possible, capture the baggage train.
 |
| "Allez, pour l'empereur!" |
 |
| "Hearts of Oak!" |
 |
| "Morte aos franceses!" |
 |
| "Viva España y Fernando el rey deseado!" |
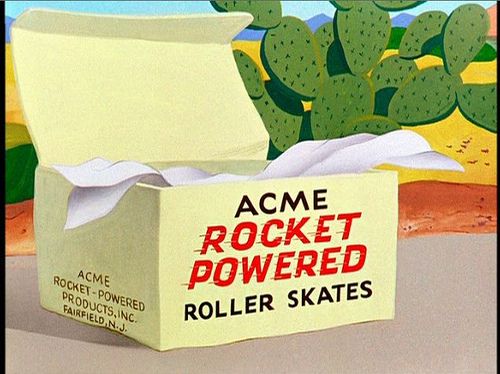
I took the French role for this game, while Quinny ably assisted with the Allied side. While I plodded the French forwards up the road towards the Spanish-held bridge, Quinny used the maneuver move option in our rules (which allows double movement as long as the units being moved stay outside 24" of the enemy's nearest formations) to shoot the British light cavalry and Portuguese over to the flank by the river. I always find the maneuver rule a little odd; why does distance from the enemy allow troops to don rocket powered skates?
 |
| Maneuver rule? |
Anyway, I didn't take advantage of this rule, while Quinny did, so more fool me! I suddenly found I had a combined arms force approaching my flank across the river before I had got myself into a position to start assaulting the crossing points.
 |
| Plod, plod, plod. |
 |
| Surprise! |
While I was massing my forces ready to assault the crossing points, I had to peel off a brigade to deal with the flanking move by the Portuguese and British light cavalry. My own light cavalry showed up in the form of the hussars who screened the infantry as they breasted the hill. The honours were basically even infantry-wise, but his cavalry were much better than mine and he also had artillery, which I had neglected to send over with the cavalry.
 |
| Hup, hup, hup! |
 |
| Hussars lead to counter the British cavalry, but are at risk of being outflanked. |
After his leading cavalry unit charged my hussars which ended in a minor victory for the British, he quickly brought up support in the form of the other light dragoon regiment and horse gun battery, quickly followed by the Portuguese brigade. I thought a forward defense posture was called for, rather than conceding the ridge, but maybe a more passive defense would have sufficed? Against Quinny, though...? I think I made the right call in the end. In lieu of artillery, I sent in the chasseurs to charge the exposed flank of the British light dragoons, about the only time I would consider doing such a thing given the quality disparity. I'd have had a stunning victory if I'd managed to pull it off, but Quinny rolled well to turn his cavalry to face the threat, denying his flank to my charge. Despite his cavalry not being able to counter charge and, in effect, being stationary, it was enough to result in a draw, saving his cavalry and preventing my chasseurs being able to break though into the heart of his attacking forces. Curses!
 |
| The hussars take the opportunity charge against the nearest light dragoon regiment as it attempts to cross the river. |
 |
| The hussars are forced back into the French infantry and the British cavalry and guns threaten the French flank. |
 |
| Here come the Portuguese! |
 |
| Huzzah! Caught him napping! |
 |
| Curses! He turns to face the danger! |
Meanwhile, the bulk of my infantry approached the Spanish held village and prepared to attack. Before they could, the Spanish cavalry had to be dealt with. My dragoon detachment took on the task, and though outnumbered, made easy work of the hapless Spaniards; so much so, that they went battlemad, charging ahead out of control ending half in, half out of the river, blown and with multiple disorders. They were now easy meat for a counter charge by the British heavies, or a flank fire from the Spanish guns!
 |
| "Agárrate fuerte, muchachos!" |
 |
| Spanish cavalry adopt a forward defensive posture... |
 |
| ...and then think the better of it, before advancing again to their peril later on. |
 |
| The Spanish held village as seen from the French side of the bridge. Spanish artillery guard the approach to the ford. |
 |
| The French infantry negotiate the woods while keeping the Spanish dragoons at bay. |
 |
| Further back in the woods, guerrillas spring an ambush to little effect, except to tie up the battalion in question for the next few turns in fruitless combat! |
 |
| The 95th Rifles provide covering skirmish fire, while the French infantry await the order to attack. The horse gun battery softens up the village defenses in preparation for the assault. |
 |
| Traffic jam! |
 |
| The Allied view of the developing attack on the Village. |
 |
| First, to deal with the Spanish cavalry. |
 |
| Crash! |
 |
| Battle-mad! RAAARRRGGHH! |
 |
| Whoops! Left like a shag on a rock! |
My horse-gun battery accompanied the infantry, rather than the cavalry where it could have helped stabilise things, but ces't le guerre! It fired in support of the attack on the nearest built up area, softening up the target before the charge went in. Usually a 3:1 ratio is needed to successfully assault a BUA, but I went in with 4 battalions just to make sure. I was spectacularly successful, smashing the first Spanish unit and careering through to the next BUA, in another display of brute force!
That was probably my high water mark. Quinny had assembled a line along the far bank of the river, defending the ford, with the best of the Spanish troops. I was organising my forces to assault that line across the river and to assault the remaining built up areas on the far side of the river. I'd calculated my chances of success in attacking the nearest BUA across the river and felt that success was a likely outcome, but hadn't banked on uncooperative dice! In a disastrous turn of events, I rolled a 1 on my pre-melee morale check, which, combined with the accumulated disorders gained by attacking across the river, resulted in the attack failing even before it launched; all 3 battalions turned tail and ran! It was only a retreat, but it put a large dent in my plans. I had hoped to take the village on the other side of the village, flank the Spanish artillery and then concentrate on assaulting the ford. But, as some well known master of the pugilistic arts was known to have said:
 |
| Even if it was self-inflicted! |
 |
| The attack goes in! One BUA falls... |
 |
| ...then on to the second! |
 |
| Let's try that on the remaining BUAs. |
 |
| Whoops! Not going to happen with that die roll! |
 |
| Run away! |
Quinny was piling on the pressure on my right flank, even if I was inflicting some damage along the way. Still, when he was inflicting more casualties on me than I could on him, the result was always going to be a forgone conclusion. His cavalry pinned most the infantry, while his artillery whittled away my numbers until his infantry closed in for the kill, either engaging in firefights, or charging. Although, when he charged my vulnerable square, he found out it still had teeth! In a very unlikely turn of events, my square inflicted a casualty on his charging line, which then impacted on his pre-melee check when he rolled low, resulting in his charge faltering 2" from the square with disorders! It was a short lived victory as he followed up with a firefight that sent the square packing. That was the first of many breaks and eventually the division crumbled, forcing a divisional morale check, which I failed, causing half my command to decamp and ending the game in a French defeat. All that done without the British infantry engaging in combat!
 |
| Sadly depleted square gets a blast of Portuguese fire... |
 |
| ...and decamps, leaving the remaining French battalions vulnerable to a flank charge from the lurking cavalry. |
 |
| British light dragoons charge the foot battery making its way to the fighting. Chasseurs counter-charge and meet them... |
 |
| ...with the expected results: casualties and disorders and heading the wrong way! |
 |
| The gunners had legged it into the forest on the hill, while the infantry in greatest danger had managed to square up. |
 |
| Now's the time to unleash on the Portuguese! A column charge on the junction of the nearest two Portuguese lines sends the Cacadores into retreat! |
 |
| I had to take the breakthrough or they would have ended up stranded between the two lines. As it was, it took the column right up the clacker of the retreating Caçadores! |
 |
| That then left them vulnerable to flank fire from the horse gun battery in the wheat field. |
 |
| The heavy dragoons saved the Caçadores and forced the remaining infantry into anti-cavalry postures |
 |
| In the backgound, a line and closed column try to dispose of the British cavalry, while in the middle, the Portuguese line charges the square, only to have the square inflict a casualty on the charging line... |
 |
| ...which caused the charge to fail, halting at 2" with casualties! Huzzah! |
 |
| But then the inevitable happened, and the square was broken... |
 |
| ...along with its supporting battalion! |
 |
| Suddenly there's a big gap where the French had been! Too many battalions in bad morale forced the divisional morale check, which I duly failed, causing half my force to retreat from the battlefield! |
 |
| Just when the British infantry was about to enter the fray. I had a nice flank charge on the highlanders, too! |
Inspiring battlefield quotes #1
 |
| "Men, we shall fight to the last drop of Iberian blood!" |
Inspiring battlefield quotes #2
 |
| "Are we there yet?" |


Sounds like a wonderful game, beautiful troops...and bagages!
ReplyDeleteLooks pretty spectacular rosbif.
ReplyDeleteLooks pretty spectacular rosbif.
ReplyDeleteSplendid looking game!
ReplyDeleteNice looking game interesting orbat too, might give it a go myself, cheers
ReplyDeleteGreat games day game Ben, quite the spectacle. Shame about the balance of the luck, but it sounds like quite a ebbing and flowing game, nonetheless.
ReplyDelete