Last Friday I took on Johnny W's recent acquisition of Tim's British and Brunswicker Minifig army. As he is one of the best tacticians in the Napoleonics group, I think I'd talked myself into losing before we even started, as many French generals did when faced with Wellington. I had vague plan of concentrating my infantry in the centre and using the light cavalry on the left flank and using the cuirassiers as a mobile reserve. I was going to use the buildings on the right flank to guard against the advance over the bridge and use the high round to attack what was in front of me.
All went well with me winning the initiative roll and getting to go first which allowed me to send my skirmished light batallion to seize the ridge, but from then on I made stupid decisions which played into his hands. I totally negated the advantage I had in cavalry by hiding them behind the ridge after they took a casualty from artillery fire, instead of using them aggressively in concert with the horse guns, which could have really hampered him. I seem to have a fear of taking casualties which doesn't really go well when playing French. In the end, it was his Brunswickers who did the damage on the right flank, and my lack of firmness in keeping to the buildings. I also bottled up my cuirassiers in defense of the bridge, rather than using them as I had originally intended.
Too late, I tried a couple of charges, one with my chasseurs against his line of Highlanders and later by a brigade in l'ordre mixte in order to try to stem the rot. Of course, neither worked as they went in unsupported. Also, lines can't charge as far as columns (duh!), so the 2 columns went in, leaving the line short of the target!
The gap between my main formation and the buildings was ruthlessly exploited by John and he got in on my flank and began rolling up the line
The columns I took out of the buildings to deal with the Brunswicker threat, then copped flanking artillery fire from across the river which negated any chance of a successful charge against the threat they were sent against.
So, both flanks had broken, the centre was under extreme pressure and my cavalry had done nothing. Not a great night's fighting for me. Afterwards, while we discussed the evening's proceedings, it was pretty clear what my problems had been, but in the moment I tend to get overwhelmed by the possibilities and try and guard against all eventualities, rather than stick to my original plan. One day I'll overcome this and no longer need to attend CWA (Crap Wargamers Anonoymous).
*Names have been changed to protect the innocent.
 The battlefield
 Initial French dispositions
 2 infantry batallions and cuirassiers head off to block the river cossing
 The British
 French reach the ridge first
 Infantry batallions following up the ridge
 1st defeat; skirmish line forced back behind columns after losing skirmish combat against the rifles
 Cowardly cavalry take a casualty and scuttle to safety
 Brunswickers approach the bridge
 Infantry occupy buildings
 Brunswickers begin their flanking movement on the ridgeline
 1st brreaking unit, victim of close range artillery and musketry.
 L'ordre mixte and the growing gap to the right
 Dangerous gap about to be filled by British line
 My feeble attempt to win back the right flank. Building up to a charge by 2 batallions; left column will be repulsed by close range artillery, while right will be clobbered by flank fire from across the river
 Unlimbered artillery about to clobber my flank
 Batallion forced to retreat from close range artillery
 The rolling up process begins...
 ...and continues
 Run away!
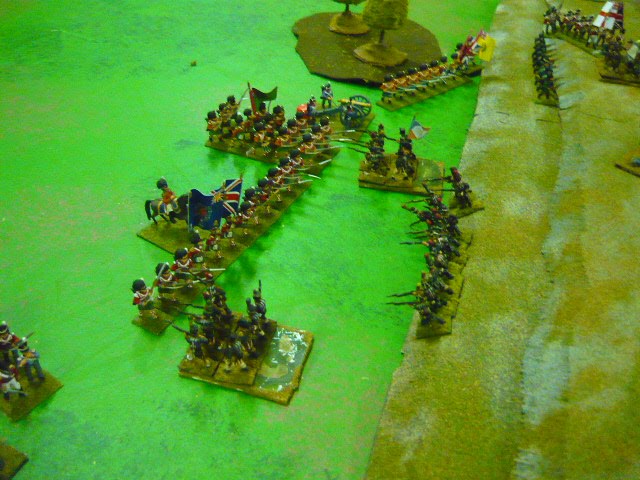 Last throw of the dice goes awry as the line gets left behind and the cloumns get clobbered by artillery and small arms before they make contact.
 Left like a shag (oo-er!) on a rock.
 Highlanders advance, but my line can't resist. Divisional morale failed after this turn and game over.
 Meanwhile on the other flank, the Brunswickers are over the bridge.
Hi
ReplyDeleteMy condolences. I am also a CWA, but I play solo... a great advantage! ;-p
However, the game seems fun!
Rafa
P.S. What ruleset you use?
Hey Ben,
ReplyDeleteDon't be too hard on your self mate. You know what you should have done and you learned from your experience. That's a good thing isn't it?
Cheers.
Hi Rafa and Jager,
ReplyDeleteWe use an in-house rules set called Cold Steel which is based on Empire, but it's been heavily added to and improved (well, I assume it has never having played the original!). We're up to the 7th edition and getting close to the 8th with quite a few rule changes trialled over the past year.
As to being on the end of another drubbing, I was just venting. I do have fun win, lose or draw, but obviously I prefer being on the winning side ;-). And, yes it is a learning experience; grist to the mill and all that!
Thanks for joining the blog, Jager. As you know my Secret Identity, I assume I know you real life?
Oops Sorry!
ReplyDeleteDid I reveal your secret identity? I've played young Johnny quite a few times and got a severe drubbing myself, more often than not, but he is fallible.
Cheers Robin.
No worries Robin. I'm sure on the law of averages I'll beat him one day!
ReplyDelete