 |
"Yer mammy weers army butes!"
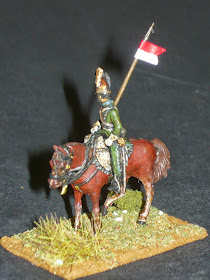
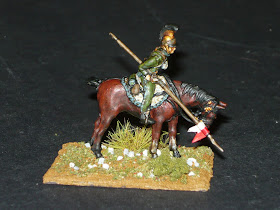
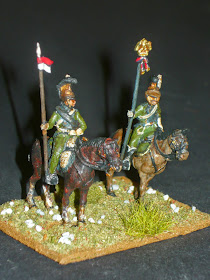
Paul's rude Scotsmen conversions using Victrix figures: Their insults are almost as damaging as their bullets and bayonets! Maybe they should give a +1 to the enemy when taking a morale test for intimidation and general hurt feelings. |
I made it to last Saturday's Croydon meeting for a game with Paul, converter extraordinaire and all round funny bugger. He'll post his version on his
blog, so if you read both versions the truth will be somewhere in between both versions, I'd say ;-)
We settled on a river crossing scenario (it must have been a while since I last played one, as I keep vowing never to play another one!), but with an added twist; no one knew where the fords were. A series of plying cards were placed under the river and whoever wanted to cross had to scout to find the crossing. There were two red playing cards randomly placed, so cavalry scouts and infantry skirmishers were needed to investigate to locate the crossing points. Besides the bridge, there were no other points across the river. Paul settled on a defensive stance, waiting for me to cross and then get stuck in. As neither of us knew where the crossings were, we started fairly spread out on the board, me trying to find it and Paul trying to anticipate where I'd be crossing.
I deployed all my voltiguers and light cavalry to scout the river bank while pushing my leading brigades close to the river to be ready to force the fords once I discovered where they were. Paul lobbed a few long range artillery shots which were lucky to cause damage, but still worth the effort as he still managed to ping at list one battalion.
I joked that with my luck the fords would appear right in front of Paul's artillery. I wasn't far wrong! I discovered the first ford to the far left of my position. The next turn I found the second one also on the left, but closer to the bridge and also right in front of one of Paul's horse batteries!
After crossing the furthest ford with my hussars, I moved one brigade quickly to follow, but didn't make a move on the right hand ford. I wanted to see if he would move his troops to meet the threat on the left and then transfer troops to head them off, leaving me able to attack his exposed flank. He did transfer some forces, but behind his front line. Curses!
I also considered throwing forces across all three crossing points, including the bridge, but decided that I didn't have enough to follow up if I had any success at one point. Instead, I fixed on crossing only at the fords, but leaving some troops around the bridge, just to keep him guessing. Actually, I put one battalion across the bridge and immediately got caught in an artillery cross-fire. Only the fact that Paul charged my battalion in line with a battalion of his own in column meant that I survived. After knocking off a figure, which equaled 50% of his front line, he failed the morale test and bugged off to the rear, allowing my reduced battalion to scamper back across the bridge to fight another day! A hard lesson that players used to playing French often come a cropper with.
I managed to occupy the empty BUA which Paul had neglected to occupy, which gave me a free flank shot down his line. He survived his forced morale check, but fell back anyway so as not to expose his flank later. I was gathering my forces in anticipation for an attack on the other BUA which he'd occupied, but he brought up infantry in line and anchored them on the building. I thought I'd leave one battalion out as a blocking force and attack with the remaining columns. Paul advanced the line and took on the blocking column in a firefight. I should have suspected something was up with the number of troops in the line as he approached. Once he fired I worked out why: It was a unit of Guard infantry! Even if they weren't Guard, a firefight with a British line is a dangerous undertaking, but with Guard infantry it's suicidal! After taking 50% casualties that column broke and ran. Any plans to charge the BUA was now abandoned as I wasn't prepared to charge with British Guard infantry on my flank.
With my cavalry chased off the field, the game looked to be petering out to a bit of a stalemate, though Paul's infantry had taken a lot fewer casualties than mine and I had committed all my forces, while he had uncommitted troops by the bridge. If the game had continued, I dare say his weight in numbers and quality could have pushed me back over the river.
 |
| The battlefield with potential crossing points marked by playing cards. French closest to camera. |
 |
| Paul's British, including a number of units from Pete Ed's collection. |
 |
| My dragoons and horse guns aimed at the bridge |
 |
| The dragoons and my right hand division and chasseurs |
 |
| The left had division and hussars |
 |
| Where will the first crossing be found? |
 |
| Nope, no there! |
 |
| While the horse battery unlimbers, the leading brigade on the right flank deploys its voltiguers to scout the riverbank. |
 |
| The dragoons move up to the bridge to keep the British guessing. |
 |
| Paul's foot guns unlimber and fire... |
 |
| ...causing the first casualty of the day. Ouch! |
 |
| The leading brigade of the left hand division also deploys skirmishers to scour the riverbank, while the foot gun battery unlimbers to reply. |
 |
| His infantry and horse gun battery on my left |
 |
| The hussars have found one ford and the infantry start moving up. One skirmish company had found the other ford, but I wasn't letting on until I'd crossed the first one. |
 |
| I was still keeping up the pretence of checking the other fords further down the river. |
 |
| The hussars burst across the river and deploy into line! (They should actually have 2 disorder points for crossing the ford!) |
 |
| The infantry aren't too far behind. |
 |
| The right hand division keeps up the pretence of looking for fords while I decide when to make the move over the second ford, or even the bridge. |
 |
| "Ya boo sucks!" |
 |
| As my hussars cross, Paul occupies the nearest BUA and forms his highlanders in square in the crop-field. |
 |
| I spring the trap and move over both fords simultaneously and start moving the second division towards the fords. |
 |
| Make haste to the fords! |
 |
| British artillery take a long range pot-shot at the flank of the dragoons as they move across the ploughed field... |
 |
| ...and take a casualty! |
 |
| To the right of the bridge, the horse gun batteries engage in a duel, each taking a gun from the other. |
 |
| The first battalion across the right hand ford receives orders from the general... |
 |
..."Occupy the vacant BUA!"
Now I'm in the flank of Paul's line. Mwa-ha-ha! |
 |
| The rest of the division follows close behind while the foot battery fires in support. |
 |
I toy with the idea of send my remaining brigade over the bridge.
It costs more disorders to cross a bridge than a ford, though! |
 |
| Back at the BUAs, Paul moves his line back from the buildings. I fired into his flank as he moved back, but he survived the resulting morale check, Curses! |
 |
While I size up the remaining BUA, Paul puts the Guard infantry into line, faced by my unsuspecting blocking column.
My dragoons head out to the left flank , while Paul's highlanders move to his right. |
 |
| In the centre, the infantry in line protect the remaining infantry as they push through the ford. The weak British line to the right is a tempting target! |
 |
| There's not a lot of room for the remaining columns to deploy, though. |
 |
| I pushed one battalion over the bridge and deployed into line in preparation for the rest of the brigade to cross behind. |
 |
| Back on the left, Paul's dragoons charge the hussars, who had attempted to evade, but were caught on the hop... |
 |
| ...and sent packing for their trouble! |
 |
| The British dragoons are now in front of my dragoons, while my hussars have nowhere to go! |
 |
| The Guard infantry reveal themselves in the firefight with the hapless blocking column, who suffer 50% casualties! |
 |
| They laugh at danger in the resulting morale test, though. HA! |
 |
| The lines from the BUA shrink under the attention of the British artillery. |
 |
| In an attempt to hurry the demise of my lines, Paul moves his own through the opportunity fire arc of my foot battery and pays the price! The line is reduced to under 60% effective, fails the resulting morale test and flees! |
 |
| Back in front of the bridge, the lone battalion in line is caught in a crossfire from two batteries, suffering one... |
 |
| ...and then two casualties. It survives the morale test, but remains shaky at best. |
 |
| Paul smells blood, but rather than patiently reducing the line by artillery fire, he charges a battalion in column. My line fires, knocking off a figure which equals 50% of the front line destroyed. |
 |
| In the resulting morale check, the column is forced into retreat. |
 |
| The hussars defy attempts at being rallied and head screaming for the rear, over the ford and off into the discard pile. |
 |
| After Paul abandoned the other BUA, I put another battalion into it and fired into the flank of the infantry which had previously occupied it. They were forced to retire through the Guards behind them, disordering them. |
 |
| My dragoons were about to be charged in the flank by Paul's heavies, so I echeloned them, despite giving him the chance for an opportunity charge. |
 |
| If he'd managed to roll equal to the distance or higher on 2d10, he'd have charged. Thankfully, he didn't! |
 |
| The situation beyond the fords, looking left from the bridge. |
 |
| The lines from the BUAs were getting depleted, so I replaced them with fresher troops and put the original lines in reserve. |
 |
| I tried exiting the nearest BUA to get into the flank of the nearest line, but got fired on and almost destroyed in the process. back to the drawing board! |
 |
| The heavy cavalry clash! |
 |
| The French dragoons come off the worst, forced to retreat over the ford with casualties and disorders. |
 |
| After their abortive expedition, the troops re-enter the BUA, but are fired upon and take casualties again. |
 |
| After so many casualties, the odds were they wouldn't survive the morale test, but I laugh in the face of danger (again!). HA! |
 |
| The troops from the other BUA exited and then fired on the flank of the nearest line when they tried to move out of danger. |
 |
| This time there was no laughing in the face of danger! Paul's line crumbled and fled! |
 |
| However, this exposed my flank to the withering fire of the Guards! |
 |
| But remember kids; I laugh in the face of danger! HA! |
 |
| The situation: I have a small bridgehead in front of the fords, based on the village, but I am fairly well hemmed in on all sides. |
 |
| The highlanders in line taunt the French in front of them. |
 |
| They advance and engage the French anchored line in a bruising, but inconclusive, firefight. |
 |
| My dead pile! |
 |
| Nothing much was going to change from this point on, so we decided to call it a day with the honours of battle shared. |


