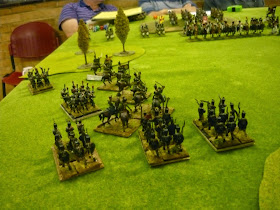
After the epic Waterloo posts, it's back to posting AARs from our club meetings. This one actually happened about a month ago on my first trip to a Friday meeting at NWA Mitcham.
It was the first outing for my Wurttembergers, but as I don't have enough except for a small division, I decided to field all my other 'bits & bobs' units including my sadly neglected Italian line troops and my Croats, as well as a French brigade. Accompanying the infantry were Wurttemberg, Italian and French light cavalry and Wurttemberg and French artillery. Hence the 'Eurotrash' heading for this post!
I was partnered by Andrew S. with his Wurttemberg army and faced Tim and his Russians while Andrew faced Garry and his Austrians in a pseudo-1812 scenario.
The terrain layout was fairly cluttered, with walls, BUAs and hedges littering the centre of the table. Whoever got the first move would determine which side seized the buildings and therefore, hold the key to the battlefield. Andrew and I managed to win the initiative and duly occupied the buildings to our immediate front.
As Tim seemed to be heading straight ahead with the bulk of his line troops and keeping a reserve of Opolchenie militia with some line troops as a reserve on his right, I thought I'd hold his main force around the buildings and walls and send a flanking force of my best troops (the French) around to the left to fall on the hapless militia and their supports. Like all good plans, they only work if your enemy does what you want him to, and Tim is not that sort of player!
While I separated my forces, linked only by a regiment of chasseur cavalry, Tim refocused his attention to the growing gap in my command. His artillery focussed on the linking cavalry as well as the cavalry screening the flanking infantry force. To save the chasseurs from the attention of the artillery and the sudden threat of vastly superior numbers of Russian hussars, I formed the chasseurs into column and backed into the gap between the woods and the hill. However, I didn't back off far enough and when Tim's hussars charged the guns in front, his breakthrough took him through into the head of the chasseurs' column, breaking them utterly. The horse gunners fled, while the poor old foot battery got squelched under-foot as well. If only I'd put the chasseurs back a little further, the woods would have prevented Tim's breakthrough move carrying through into them, allowing them to counter-charge. D'oh!
Anyway, Tim then unleashed his infantry into the centre where they came up against the Wurttemberg infantry. After an inconclusive charge, he then overwhelmed me with numbers, causing a further widening of the gap in the centre. I wanted to be able to charge my Wurrtemberg chevaux leger at the Russians behind the wall, but realised that charging through the artillery and over the wall would just disorder the cavalry too much for the charge to succeed. If I had KGL light dragoons, or Guard Grenadiers a Cheval then it would have been a no-brainer, but Wurrtemberg light cavalry just aren't that sort of quality!
What really cooked my goose with the Wurrtemberg infantry was Tim's killing of my general in a burst of flank fire on the unit he was attached to. In a move Pistol Pete Ed. would surely have approved of, Tim rolled the dreaded double 0. Curtains for my general! All units in the vicinity were forced to take a morale check, some breaking, some retreating, but all causing a massive gap to suddenly open.
By that time my left wing flanking movement had reached the point where it could attack. First, I needed to cover their advance. The Italian chasseurs had done a great job, but were beginning to suffer from close artillery attention, so I did a passage of lines with an infantry battalion, so that the fresh infantry would cop the attention from the artillery and not run the risk of breaking. I didn't want the weakened cavalry breaking when my big charge was preparing to launch. That would just put unnecessary negatives on the likelihood of the charge going in. So the infantry advanced in column to shield the charge from artillery fire as well as any supporting infantry fire. Their charge went in successfully, but not as devastatingly effective as I had hoped. Without absolutely crushing the Russian line infantry in front of me, I couldn't then have the fun of getting stuck into the opolchenie, which was my ultimate goal!
The Croats and Italians in the centre of the table had managed to weather the morale test brought on by the general's demise by being outside the range affected, and got stuck in, repulsing a Russian attack. The Italians in the building exited to add their weight to the attack, but all that did was deny myself a flanking shot at any further attack and allow the Russians to occupy the building and gain a flanking shot at any further attack I launched!
Anyway, with this act the game petered out with the Russians ascendant on my flank and an inconclusive draw on Andrew's flank. Tim said that though he had the upper hand, he wouldn't have been able to exploit it with the quality of troops he had and probably have had to withdraw after my forces got their act together after the my centre rallied. Anyway, a real game of swings and roundabouts with some stupid mistakes on my part, but also a potentially game-winning flank attack that just couldn't quite make it after my centre crunbled.
 |
| Eurotrash! |
 |
| Wurttembergers on debut |
 |
| The Italian chasseurs lead the flanking move. |
 |
| The French infantry follow |
 |
| Wurttembergers, Croats and Italians move straight ahead and occupy the ridgeline |
 |
| Andrew races ahead to secure the woods and the nearest buildings |
 |
| The target for today: Opolchenie! |
 |
| Wurttembergers on parade! |
 |
| One Italian battalion (love the alliteration!) occupies the building just before the Russians arrive |
 |
| The Wurttembergers stay in reserve while the Croats and Italians head forward in the centre. Tim's main force approaches; I wanted the Russians to negotiate all the obstacles and gain all the disorders. |
 |
| My flanking force emerges from the woods and heads for the Russian left flank and those juicy opolchenie! |
 |
| Tim alters the orientation of his forces to meet the threat (especially with guns and cavalry!) |
 |
| My chasseurs form echelon to screen the advancing infantry |
 |
| My French chasseurs have backed off between woods and hedge, but not far enough! The horse battery in front stands out like dogs' wotsits asking to be charged by the Russian cavalry |
 |
| Here they are, blissfully unaware of their danger! |
 |
| My Wurttemberg cavalry have lined themselves up for a perfect charge at the Russian infantry in line behind the wall. If only they were as good as they thought they were! |
 |
| The colonel of the regiment weighs his chances, then decides against it! |
 |
| It's a job for the Poor Bloody Infantry! |
 |
| Curses! Russian hussars have put the horse gunners to flight and totally blitzed the foot gunners, running for the edge of the board |
 |
| With 80% casualties the chasseurs are bugging out, never to be seen again! |
 |
| Tim moves forward into the gap. |
 |
| The Wurttembergers fire into the flank of the cavalry, who fail their morale test and run for the hills! A minor victory compared to the damage they wrought, but I'll take it. |
 |
| On the other flank, my French infantry reach the woods, while the cavalry screen their approach and take the artillery fire. Problem is they're getting beaten up and also block the infantry behind them |
 |
| The cavalry back off, replaced by a lone infantry column,which immediately takes casualties from the artillery. |
 |
| That then makes room for the rest of the infantry to charge into the woods at the Russian line. |
 |
| I only manage to push the line out of the woods, rather than crush it, and now have another Russian column attacking my flank. The opolchenie are oblivious to how close they are to danger! |
 |
| Back with the Wurttembergers; they meet a Russian charge head to head! An inconclusive draw was fought. |
 |
| However, weight of numbers prevail and my defences are breached! |
 |
| The jaegers go over the wall where the cavalry feared to tread. |
 |
| Disaster! The general is killed! |
 |
| My Wurttembergers can't stand the pressure and break after losing their morale checks. |
 |
| The Croats and Italians beat back one charge... |
 |
| ...and then another, but weight of numbers are against me! |
A couple more turns and I reckon I could have turned things around with my French troops pushing around behind the Russian line! It was the proverbial one that got away (It was THIS big, I tells ya...) :-)


